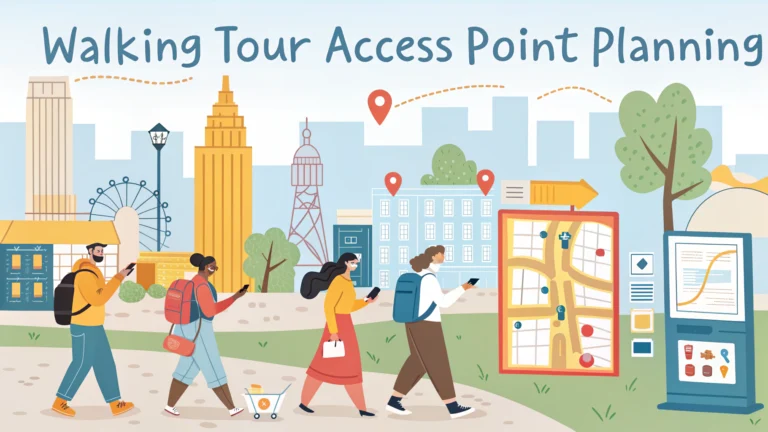
Planning accessible starting points is essential for creating successful self-guided walking tours.
A well-chosen access point should have adequate parking or public transportation options within a 5-minute walk.
Key Features of Effective Tour Access Points
- Safe, well-lit areas
- Public restroom facilities nearby
- Clear signage and wayfinding
- Protection from weather (covered waiting areas)
- Phone/internet connectivity for digital guides
Transportation Considerations
Select locations served by multiple transportation modes to accommodate different visitor needs:
- Public transit stops
- Parking facilities (paid or free)
- Ride-share pickup zones
- Bike racks/bike share stations
Practical Amenities Checklist
| Amenity | Distance from Start Point |
|---|---|
| Public Restrooms | Within 500 feet |
| Water Fountains | Within 1/4 mile |
| Food/Beverages | Within 1/4 mile |
| First Aid/Emergency Services | Within 1 mile |
Safety and Accessibility Tips
- Choose areas with regular foot traffic
- Ensure wheelchair accessibility
- Install emergency contact information
- Provide alternate routes for mobility-impaired visitors
The starting point should feature a clear orientation map displaying the complete tour route with major landmarks.
Digital Integration
- QR codes for tour information
- GPS coordinates for navigation apps
- Download links for offline maps
- Local WiFi hotspot information
Consider seasonal variations when selecting access points – what works in summer might not be suitable in winter.
Documentation Requirements
- Hours of operation for nearby facilities
- Emergency contact numbers
- Alternative starting points
- Accessibility information
- Parking rates and regulations
Test the access point personally during different times of day and weather conditions before finalizing it for your tour.
Keep contact information updated for local transportation services:
- Taxi services: Check local listings
- Bus schedules: Visit local transit authority websites
- Parking information: Contact municipal parking authorities
Document any seasonal closures or maintenance schedules that might affect access to the starting point.
Environmental Considerations
Weather protection and environmental factors play a crucial role in access point planning:
- Wind shelters or barriers
- Covered gathering spaces
- Adequate drainage systems
- Sun/shade balance throughout the day
Seasonal Adaptations
- Winter snow removal plans
- Rain drainage maintenance
- Seasonal signage updates
- Alternative indoor waiting areas
Maintenance and Updates
Regular maintenance ensures access points remain functional and appealing:
- Weekly facility inspections
- Monthly signage checks
- Quarterly accessibility audits
- Annual infrastructure reviews
Community Integration
Successful access points should complement local community needs:
- Coordination with local businesses
- Integration with existing tourist infrastructure
- Support from neighborhood associations
- Regular feedback collection
Conclusion
Effective tour access points require careful planning, regular maintenance, and continuous adaptation to changing conditions. Success depends on balancing visitor needs with practical considerations while maintaining safety and accessibility standards. Regular monitoring and updates ensure long-term viability and positive visitor experiences.
Final Implementation Checklist
- Complete safety audit
- Verify all amenities are operational
- Confirm transportation schedules
- Test digital integration components
- Document emergency procedures
FAQs
- What is the ideal distance between walking tour access points?
Access points should typically be spaced 0.25 to 0.5 miles apart to ensure comfortable walking distances and allow easy entry/exit points for visitors with different mobility levels. - How do I identify the best locations for walking tour access points?
Look for areas with adequate parking, proximity to public transportation, clear signage opportunities, and safe pedestrian infrastructure like sidewalks and crosswalks. - What amenities should be available at walking tour access points?
Essential amenities include restroom facilities, water fountains, benches or seating areas, trash receptacles, and informational kiosks or signs with maps and route details. - How can I ensure my self-guided walking tour is accessible to people with disabilities?
Include wheelchair-accessible routes, provide information about surface conditions and slopes, ensure curb cuts at crossings, and mark alternative routes around stairs or steep sections. - What’s the best way to mark walking tour routes and access points?
Use consistent, weather-resistant signage, ground markers, or colored trail blazes, and provide GPS coordinates for digital navigation. - How long should a self-guided walking tour typically last?
Most successful self-guided tours last between 1-2 hours and cover 1-3 miles, though multiple route options of varying lengths can be offered. - What safety features should be incorporated at access points?
Include adequate lighting, emergency contact information, clear street addresses for emergency services, and proximity to populated areas when possible. - How do I create effective wayfinding for tour participants?
Implement clear directional signage, numbered stopping points, detailed maps with landmarks, and distance markers between key points. - What information should be included at each access point?
Display maps showing current location, route options, estimated walking times, points of interest, accessibility information, and emergency contacts. - How can I maintain and monitor walking tour access points?
Establish regular inspection schedules, implement a maintenance reporting system, ensure signage remains visible and legible, and regularly update posted information.